Wednesday, January 23, 2013

News for January

More to Come


It never rains but it pours, as the saying goes.
 
My Mom passed away on the 16th of January.
 
Needless to say, things are a bit mixed up around here. 
 
As she lived in another state, this is requiring travel and time.
 
I will post what I can, when I can.
 
The drawing will take place as planned.
 
I appreciate the comments you leave and encourage you to continue to do so.
 
Sincerely, PB Ray


Tuesday, January 15, 2013

Part 2 Custom Wig


Custom Wig for Rochelle
 
 
We left Part 1 with Rochelle covered in plastic wrap and my own version of a wig base.  Because of Rochelle's ears the wig must be custom made.  If you missed Part 1, go here:


Now it is time to add color to the wig cap.  I am using a combination of 3 colors, but you can use just one if you like.  The tricky part is making sure you get some Mod Podge mixed in with your paint.  Why?  So the paint will not separate from the wig cap.  Like tends to stick to like in the world of glue and paint.  The paint will tend to want to go its own way without adding the Mod Podge.
 
If you don't want to mix paint, just use a middle hue of pink like what you see in the photo.  Compare your color to the hair you are using to be sure it will not stick out like a sore thumb.
Mix the paint and the Mod Podge 50/50 - and remember, the glue dries clear.
 
2 coats of the paint/glue mixture need to be applied and allowed to dry.


Follow the paint/glue mix with a coat of straight Mod Podge. 
Let it dry completely.


I have cut a hank of hair that I like and am going to begin applying it at the base of the hairline in the back.
 
 
I put Mod Podge along the hairline. 
 
 
I set the hair on top of the glue, press it with my
fingertip and let it dry for a few minutes.
 
 
After it has dried some, I add more glue on top of the loose hair. 
I work it into the hair gently with the paint brush. 
The area is about 3/8" or 5mm between the arrows. 
Again, let this dry.
 
 
Continue going around adding the hair in layers.


I am at the halfway point here. 
Already you can see what a different look
this will be for Rochelle.


I have added 2 more rows of hair. 
 
Next step:
I use hot water and wax paper to "set" the hair ends
before the final glue.
 
 
Wet the tips of the hair hank you wish to use for the
sides next to the ears.
 
Use your fingertip to make sure the hair is straight
 - flatten it against the wax paper.
 
Then roll the hair end under and fingertip press.
Let it air dry on the wax paper.
 
I am posting this without photos of the finished wig- too much going on right now- but- you can still finish your wig!  Use the now dry hair that is set with a bend and glue the underside to the wig base.  This hair goes around the ears and also creates bangs. 
When I get time, I will put in the photos of the finished wig.
 
Remember to leave a comment for an entry for the January Drawing. 
This month's prize will be an assortment of hair for making your own wigs or to re-root your favorite doll.  I will post a picture of that later as well.


Tuesday, January 8, 2013

Part 1 Custom Wig

Let's Make A Wig For Rochelle
 
 
A friend of mine bought herself a lovely Rochelle re-paint, but the doll still has her original hair.  Not wanting to spoil the re-painted face, she wondered if she could "make do" with a wig.  My own Rochelle still had her original hair too-- which I am not fond of -- so what a nice excuse to re-do my own Rochelle and help a friend!


First things first: What hair to use to make the wig?
Answer: Real Hair of some sort.
 
Where to get this hair?
 
First, let me tell you, if you order hair from Stella's Fiber Farm, you will be spoiled, spoiled, spoiled.
Her doll hair is just beautiful- very high quality and her dyes are to die for. She has different types of hair to chose from as well.  For Rochelle I chose the alpaca.

Want to be spoiled too?


  I bought this color because it still has silver and gray tones that match Rochelle's skin tones.

Let's get started.
 
 
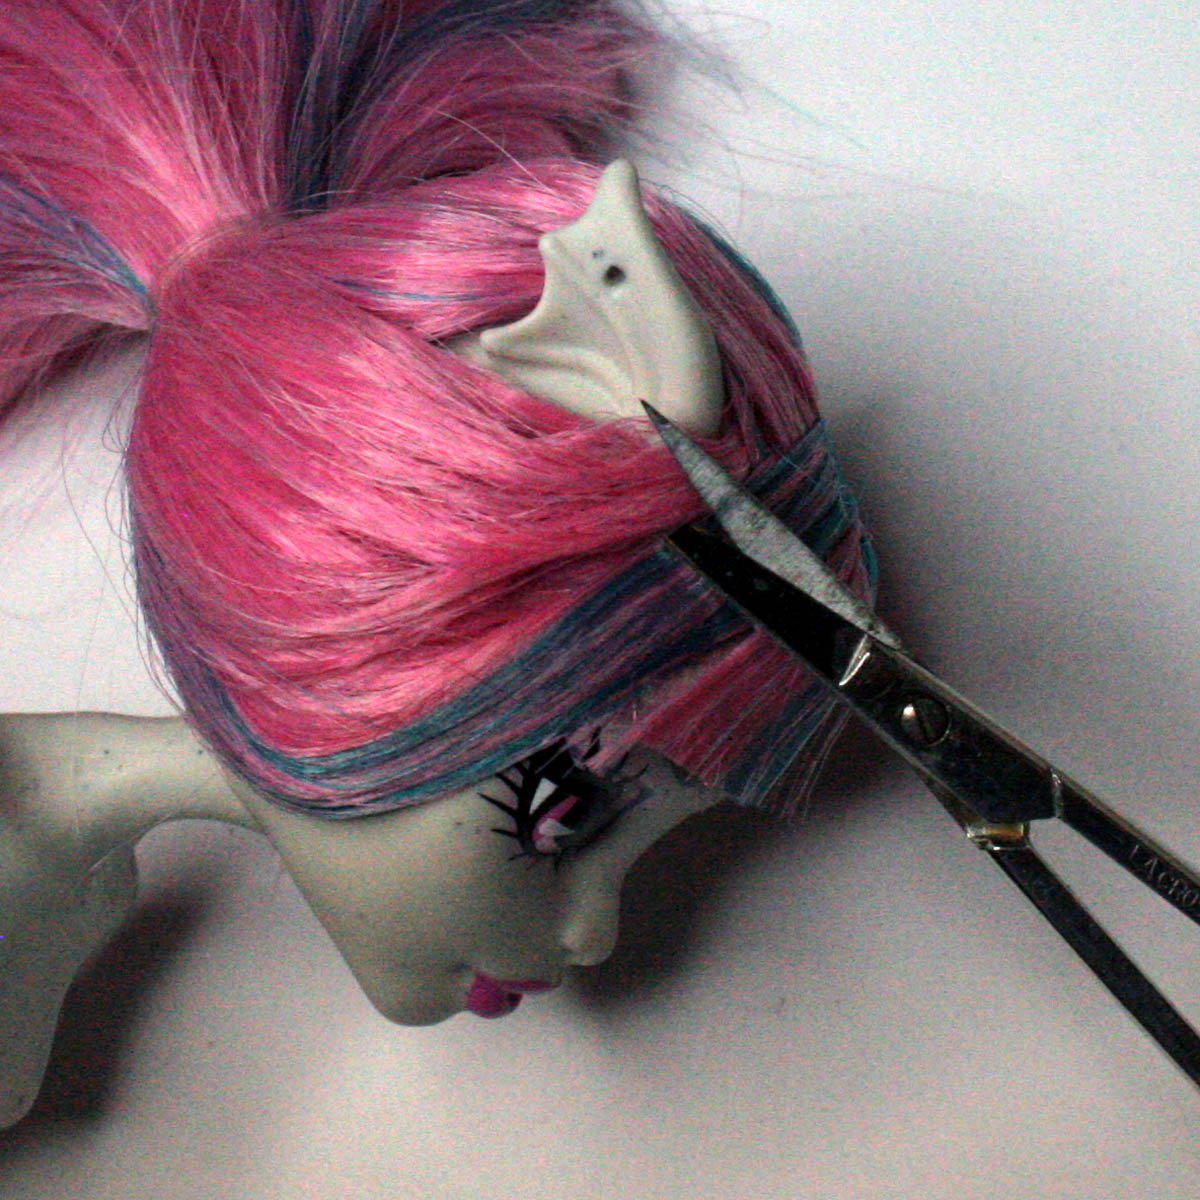
Put her hair into a ponytail with a band.
 
 
I use curved manicure scissors to cut off her hair.
 
 
Snip only a bit of hair at a time, and
cut as close to the scalp as you are able.


 Ponytailed hair is off, next come the bangs.


Once you have trimmed off the bangs, it is time to go all over her head trimming as close as you can with your scissors.


Who knew she had eyebrows?!
 
I love this face sculpt.


I am using clear plastic wrap in 2 layers to protect my doll from the glue. 
Pull the wrap tight and towards the face leaving the rest as smooth as possible.


Make sure you push the wrap close to her ears.
 
 Second layer of plastic wrap.
 
Next comes the tape.
The tape holds the layers in place so it won't shift while I am working.
 
And then... another layer of plastic wrap.
 
Same instructions- pull it tight, towards the face


Clip carefully around the ears and fold down.  This layer of wrap will actually be the bottom most layer of your wig. 


  Next Up: The poor crafts person's latex.
 
1. Tissue Paper torn in shreds
 
2. Mod Podge                        
 
3. Water                                
 
4. Brush                                
 
 
Important: WET your brush with water and then dab out the extra to keep your brush from getting gunked up.
 
 
Paint some Mod Podge on the plastic wrap- I keep this area small and put more on as I go. 
 
 
Add bits of the shredded tissue and make sure they are saturated with the Mod Podge.
 
Keep going, following the hairline of your doll.  Glue, tissue, glue, tissue- until you have at least 2 layers of tissue all the way around.  Then you let her dry.  No, really.  Let this dry completely.
 
 
You can make a wig using liquid latex - but- liquid latex is very expensive and it takes practice to learn how to use it.  The Mod Podge and the tissue combined with the plastic wrap make up a kind of controled version of latex- because the layers will remain flexible for use as a wig.
 
 
This is the end of Part 1. 
 
Part 2 will be up in a few days.


The Drawing is Back for January!
You will recieve an entry for every comment you leave on a January Post. I will write your names on slips of paper and into the hat they go. The drawing will be held on Feb. 1st 2013.
The prize for January will be announced next week. 
 
So leave a comment and get your first entry!
 
 
Feather Wig Instructions and Custom Hair Tutorials here: http://monstercrush.blogspot.com/2012/06/custom-monster-high-tutorial-hair-and.html